Modding Tutorial
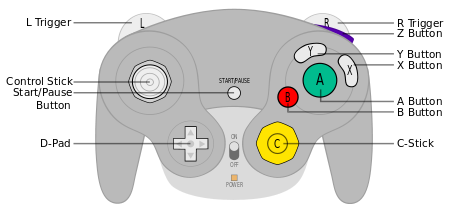
Following this tutorial is a great way to get started with editing fighters in Canon Collision. For a full reference of every operation check out the Manual. All controller inputs mentioned in this tutorial use the Gamecube controller layout.
Setup
First start a local game with 2 players both playing the same character. Ensure your controller is player 1 (leftmost on the character select screen) Player 2 can be a CPU or a different controller.
Basics
When editing fighters or the stage we need to set, this state will be referred to as edit mode from here on:
- The camera to orthographic mode - press esc
- The game to pause - press spacebar or start on the controller
1 to select player 1.
Now press F9 to toggle on collision box display.
Unpause and play around with the character, you will see that hitboxes are red and hurtboxes are white with a colored outline.
Return to edit mode and press F9 again to change between other render modes until we reach the standard render mode again.
Lets turn on the ECB display for all players.
- Press 1
- Press F9
- Press 2
- Press F9
Player states
Return to edit mode, select your player (press 1) before continuing. Press F3, to enable player state debug information. You can now see debug info at the top of the screen.
Hold X on your controller and press spacebar on your keyboard. Your action will go from Idle -> JumpSquat. Press spacebar again and again until your action goes from JumpSquat -> JumpF. Press spacebar again and again until your fighter lands.
Playing with colboxes
Ensure your fighter is in its Idle state again.
Position your cursor, near your fighter, and press F.
Player 1 should now have a new colbox (Collision Box).
Now select any colbox with left click. The colbox should be fully green. Use the square bracket keys, [ and ], to resize the selected colbox.
Hold shift and left-click to select multiple hitboxes. Press the A key. Now you can move the selected colboxes by moving your mouse. Left click to confirm the new position.
Click and drag, with right click to select multiple colboxes. Select all your colboxes and press D to delete them all.
Play around with colboxes to your hearts content, then test out your creation in game.
Adding/removing action frames
Return your player to the idle state, return to edit mode, and select your player.
Notice how the player state debug information says frame: X/Y.
This means the Idle action has Y frames and the player is currently on frame X.
0 refers to the first frame as that is easier to work with when programming.
Lets add another frame to this action by pressing M.
If we were on frame: 9/20, a new frame is inserted at index 10, and we will now be on the new frame at frame: 10/20.
TODO: This desyncs the hurtboxes from the animation of the model, lets use this opportunity to explain how to run the hurtbox generator.
Hurtbox generator
TODO
Camera
As you are editing your fighter you will want to manually control the camera to better see your fighter. Middle click to pan the camera. Scroll to zoom the camera. Press Backspace to return control of the camera to the game.
Command Line
Press '~' to open the command line in Canon Collision.
A command looks like this:
package:help
We use the help command to learn what an object can do and what other objects it contains. By looking under the Accessors section, we can see that the package contains entities, stages, meta, and rules. Lets further investigate entities.
package.entities:help
Save/Reload
Run the command: package:save
Wait for the 'Save completed successfully' message to appear.
Close Canon Collision and reopen it to verify that your changes are still there.
Make a change to your fighter and then run: package:reload
Verify that your fighter is the same as when you last ran package:save
Package
Keys & Context
Everything that can be interacted with in the game is an entity, that include fighters, projectiles and items. package.entities stores the frame data for every entity in the game.
package.entities is a keyed context vector of entities, that means it contains multiple entities. (accessible by both a key, an index and context)
We can access a specific entity via its filename, assuming you have a fighter with filename foo.cbor then we can run:
package.entities["foo.bor"]:help
But thats generally not useful. (We don't want to have to check the filename of the entity we are editing.)
Instead we make use of the context system.
By using ? as our key, we tell Canon Collision to automatically choose the fighter to access via in game context.
In this case it uses the entity used by the player we have selected with keys 1234.
package.entities[?]:help
If this doesn't display the entity help, ensure you are in edit mode and you have selected a player (1)
Fighter data
Lets play with some of the entity properties we can see from running the help command.
This will get the number of aerial jumps the entity can do:
package.entities[?].air_jumps:get
Try setting the number of aerial jumps the entity has:
package.entities[?].air_jumps:set 99
Try setting other properties listed by the help command and see what happens.
Descending the tree
Individual colboxes can be accessed and manipulated, however they are stored in an object in an object in an object in an object.
To find them we are going to do some exploration with the help command.
We see that the entity contains an actions property which is a context vec.
(once again this object contains multiple actions, however they are only accessible by index and context.)
package.entities[?].actions:help
We can use an index to access a numbered element of the vector
package.entities[?].actions[0]:help
However once again this is rarely useful so we stick to using context. This way we access the current action the selected player is in.
package.entities[?].actions[?]:help
We can see two properties: iasa and frames.
package.entities[?].actions[?].frames[?]:help
We can see the colboxes property among numerous other properties.
package.entities[?].actions[?].frames[?].colboxes:help
Nice, now we know how to access colboxes, and (hopefully) better understand how frame data is structured.
Colbox resize
Now select a hitbox by clicking on it in canon collision and run this command:
package.entities[?].actions[?].frames[?].colboxes[?].radius:set 10
Variants & Hitboxes
Select a colbox and run this command:
package.entities[?].actions[?].frames[?].colboxes[?].role:variant Hit
This changes the role of the colbox to be a hitbox. Test it out in game.
Now that we have set the role to hit, we have access to more properties on the role.
package.entities[?].actions[?].frames[?].colboxes[?].role[0].bkb:set 9001
We set the base knockback for the hitbox to 9001 Test this out in game!